
Web Content Filtering in Microsoft Defender for Endpoint allows you to filter content based on categories. There are a number of predefined categories to choose from.
Web Content Filtering in Microsoft Defender for Endpoint
For Web Content Filtering to work, you need to have Web Content Filtering enabled in Advanced Features. In the Microsoft Defender portal, go to Settings – Endpoints and enable Web Content Filtering.

Microsoft Edge uses the built-in SmartScreen. For other web browsers, Network Protection is used. Both SmartScreen and Network Protection must therefore be active and properly configured.
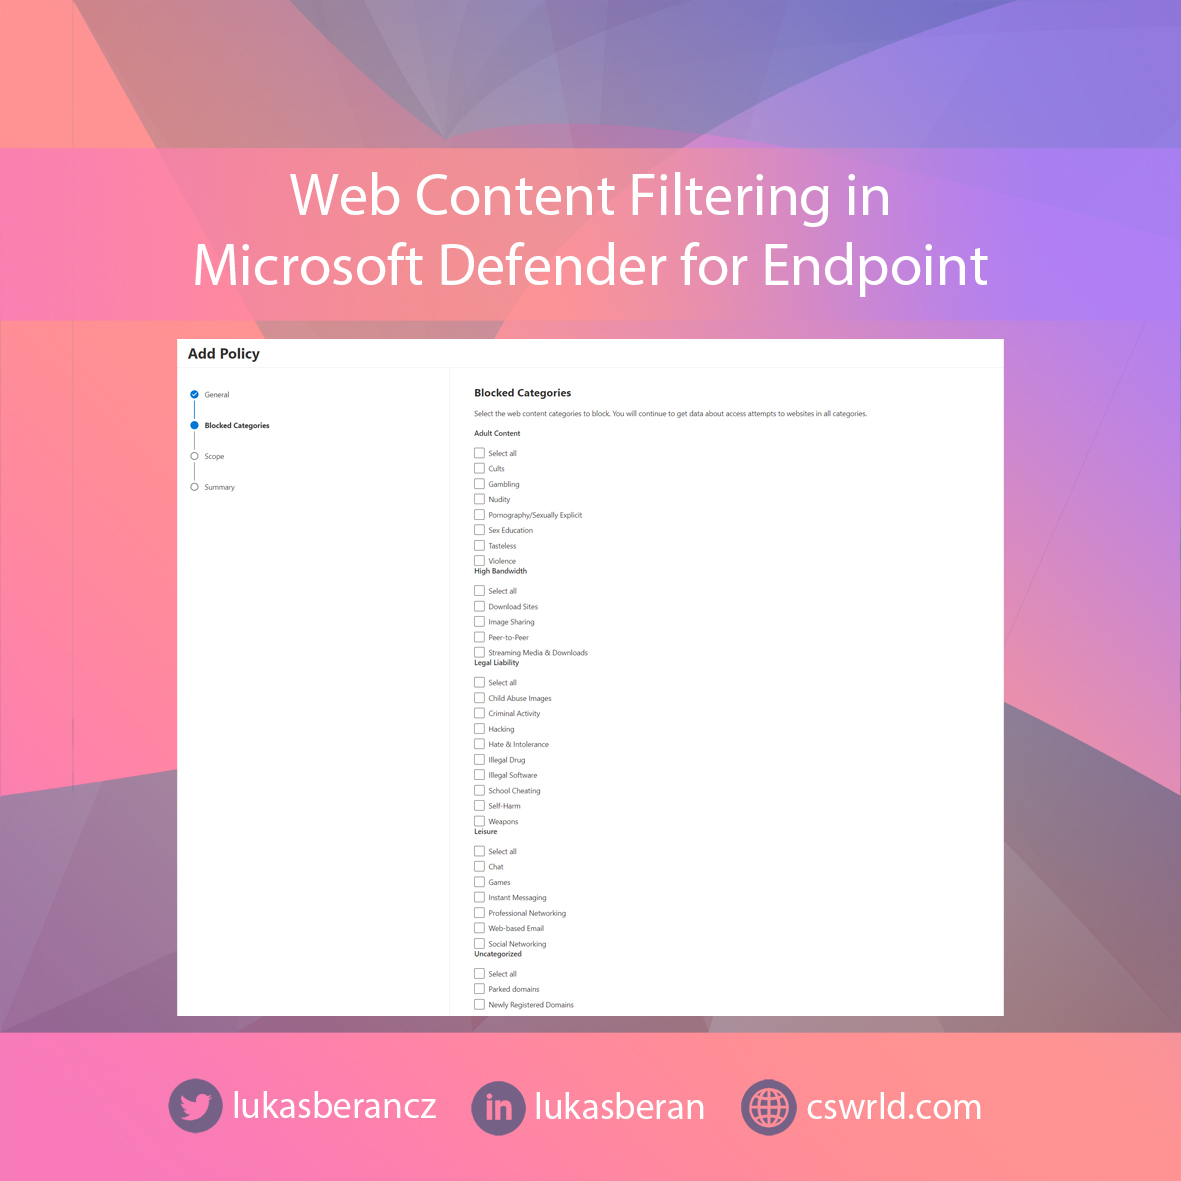
For example, do you want to block adult content on corporate devices? Or peer-to-peer networks? Or illegal content like drugs, hacking, child abuse? Or games or social networks? Just choose one of the pre-made categories and you don’t have to start.
You don’t have to apply these web content filtering policies to all devices in your organization. Feel free to choose only select groups of devices to which the policies apply. Or you can have different policies for different groups of devices. It’s up to you.
Web Content Filtering reports
Because Web Content Filtering uses the aforementioned Network Protection and SmartScreen, reports are also available for Web Content Filtering.
The principle of the reporting mode for Web Content Filtering is to create a policy where no categories are checked. At that point, all categories will be activated in audit mode so that a report for each category will be visible.
In the Microsoft Defender portal, go to Settings – Endpoints and create a new policy in Web Content Filtering. Leave the categories blank and just select which devices you want to apply the policy to. Feel free to select all devices.

View report for Web Content Filtering
To see the results, go to Reports – Web Protection. At the very bottom of the page is the Web activity summary and the Web content filtering report.